Linux - Installation of OEL 5 Update 3 on VMWare 32-bit (x86) machine
About
This article is a step-by-step manual to install Oracle Entreprise Linux 5 on a VMware Server.
You can also search a pre-installed oracle vmware image in the appliance part to the VMWare website : http://www.vmware.com/appliances/directory/cat/508?k=oracle
Articles Related
Prerequisites
- Download the Oracle Entreprise Linux 5 :
- Choose as product pack : Entreprise Linux and as plateform x86 32 bit and hit the OK button.
- Edelivery show you the file in two forms (CD and DVD) and give you the choice to download the source or the application. Choose the Application DVD as :
![]()
- Download and install the VMware Server. (I use the version 2 for this article)
- Create a virtual machine 32-bit (x86) with this minimal requirement :
- Type : Red Hat Entreprise Linux 5
- x86 compatible CPU
- 1 GB RAM
- 10 GB available disk space (3.5 GB for the Oracle software + 1.5 GB for the database + 3 GB for OEL5 + 2 GB swap)
- Choose for the DVD, the ISO file of the Oracle Entreprise Linux DVD.
You can add a datastore in order to give the location of the DVD with the VMWare server 2 by clicking on your computer node in the left pane and by clicking the link “Add Datastore” that you will find in the top-right corner of the page.
Steps
- When starting the machine, it will boot using the DVD
- The boot screen appears with the boot: prompt at the bottom of the screen.
- Select Enter to continue with a graphical install on the console.
- The installer scans your hardware
- Skip the media test
- Oracle Enterprise Linux splash screen
- Click on Next
- Language Selection
- Accept the default or change it
- Keyboard Configuration
- Accept the default or change it
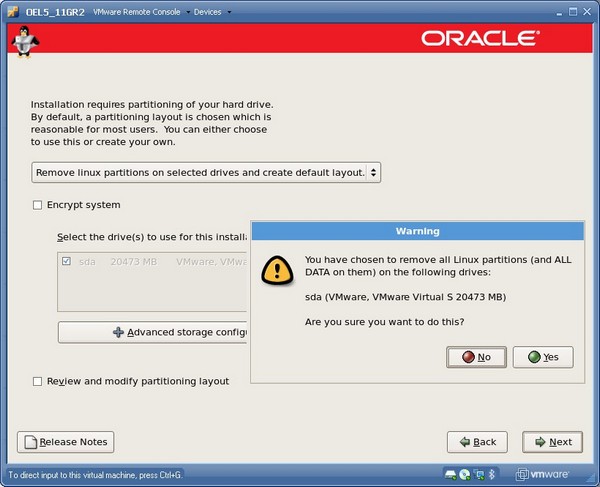
- Clicking on the Next button, you will have a warning message about the partition table, click Yes
- Partition : Leave the default, click Next and accept the Warning
- Network Configuration
- It is usually best to configure database servers with a static IP address. To do so, click on Edit .
- A pop-up window appears. Uncheck the Configure using DHCP box, and enter the IP Address and Netmask for the server. Be sure that Activate on boot is checked, and click on OK .
- In the Hostname box, select manually and enter the hostname.
- In the Miscellaneous Settings box, enter the remaining network settings.
- Time Zone Selection
- Choose the time settings that are appropriate for your area. Setting the system clock to UTC is usually a good practice for servers. To do so, select on System clock uses UTC.
- Set Root Password
- Enter a password for root, and enter it again to confirm (for example, password)
- Package Installation
- This guide will follow the Oracle recommended practice of using a “default RPMs” installation. Accept the default software selection and click on Next.
- Click Next to begin the installation
- After software installation is complete, Click on Reboot. The computer reboot.
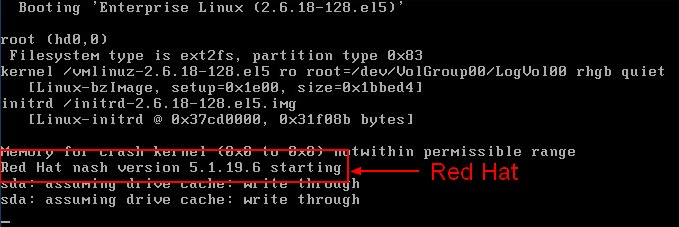 As you can see in the reboot screen, Oracle Entreprise Linux is a clone of Red Hat Entreprise Linux.
- Welcome : Click on Forward
- License Agreement : select Yes, I agree to the License Agreement and click on Forward.
- Firewall Configuration : Select Disabled and click on Forward.
- SELinux : Select Disabled from the drop down bar and click on Forward.
- Kdump : Do not enable Kdump. Accept the default and click on Forward.
- Date and Time : Set the Date and Time. If you want to use an NTP server (recommended), select Enable Network Time Protocol and enter the name of the NTP server.
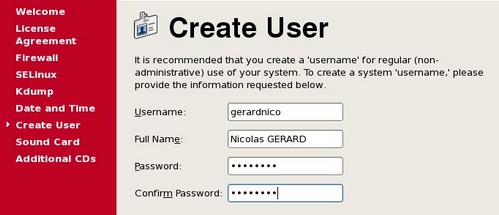
- System User : Create an account for yourself.
- Sound Card : No sound card was detected, click on Forward.
- Additional CDs : Click on Finish.
- The system will reboot.
A graphical login screen appears. Enter your credential and you will see the Gnome Gui because it's the default GUI of the installation.

Post-Installation task
- Activate your network interface