Linux - Installation of OEL 5 Update 5 on VMWare 32-bit (x86) machine
About
This article is a step-by-step manual to install Oracle Entreprise Linux 5 on a VMware Server.
You can also search a pre-installed oracle vmware image in the appliance part to the VMWare website : http://www.vmware.com/appliances/directory/cat/508?k=oracle
Articles Related
Prerequisites
- Download the Oracle Entreprise Linux 5 :
- Choose as product pack : Entreprise Linux and as plateform x86 32 bit and hit the OK button.
- Edelivery show you the file in two forms (CD and DVD) and give you the choice to download the source or the application. Choose the Application DVD as :
![]()
- Download and install the VMware Server. (I use the version 2 for this article)
- Create a virtual machine 32-bit (x86) with this minimal requirement :
- Type : Red Hat Entreprise Linux 5
- x86 compatible CPU
- 1 GB RAM
- 10 GB available disk space (3.5 GB for the Oracle software + 1.5 GB for the database + 3 GB for OEL5 + 2 GB swap)
- Choose for the DVD, the ISO file of the Oracle Entreprise Linux DVD.
You can add a datastore in order to give the location of the DVD with the VMWare server 2 by clicking on your computer node in the left pane and by clicking the link “Add Datastore” that you will find in the top-right corner of the page.
Steps
- When starting the machine, it will boot using the DVD
- The boot screen appears with the boot: prompt at the bottom of the screen.
- Select Enter to continue with a graphical install on the console.
- The installer scans your hardware
- Skip the media test
- Oracle Enterprise Linux splash screen
- Click on Next
- Language Selection
- Accept the default or change it
- Keyboard Configuration
- Accept the default or change it
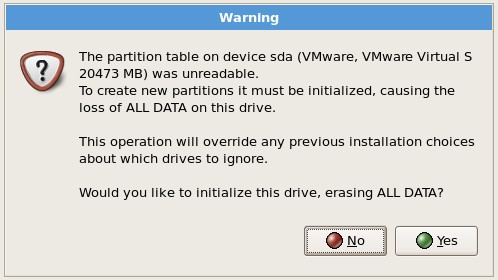
- Clicking on the Next button, you will have a warning message about the partition table, click Yes
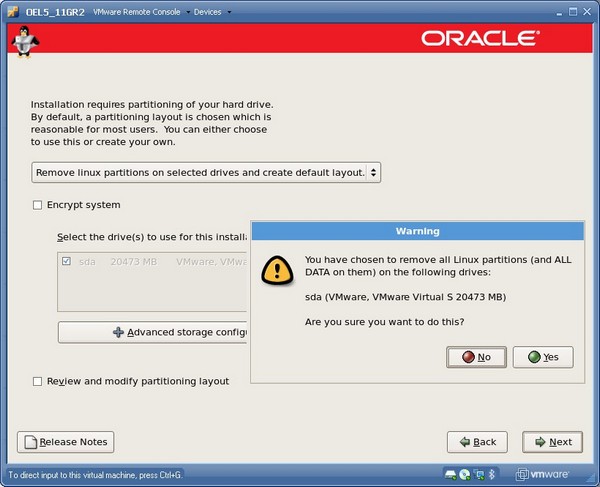
- Partition : Leave the default, click Next and accept the Warning
- Network Configuration
- It is usually best to configure database servers with a static IP address. To do so, click on Edit .
- A pop-up window appears. Uncheck the Configure using DHCP box, and enter the IP Address and Netmask for the server. Be sure that Activate on boot is checked, and click on OK .
- In the Hostname box, select manually and enter the hostname.
- In the Miscellaneous Settings box, enter the remaining network settings.
- Time Zone Selection
- Choose the time settings that are appropriate for your area. Setting the system clock to UTC is usually a good practice for servers. To do so, select on System clock uses UTC.
- Set Root Password
- Enter a password for root, and enter it again to confirm (for example, password)
- Package Installation
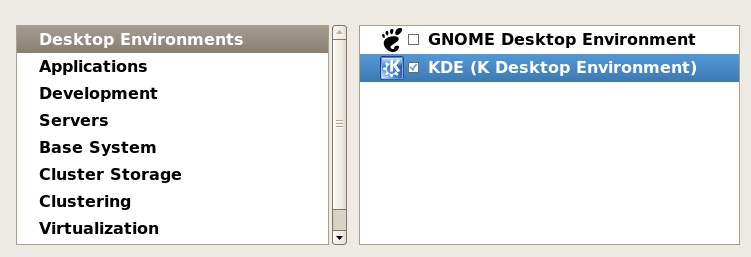
- In this part, you can choose additionnal prepackage that feet the usage that you want to made with your linux installation
- You can choose “Customize Now” and by clicking yes, you can choose in the next screen the software parts that you want to include such as an other desktop environment. An Oracle Database installation will always verify that you have all package needed, then choose what you want or leave the default choice.
- Click Next to begin the installation
- After software installation is complete, Click on Reboot. The computer reboot.
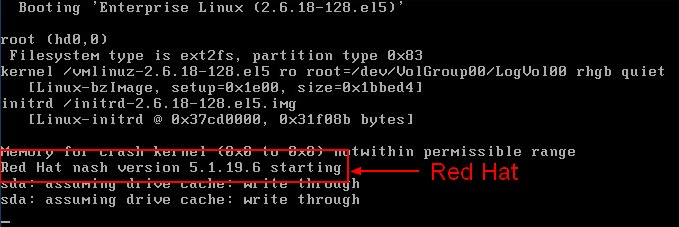 As you can see in the reboot screen, Oracle Entreprise Linux is a clone of Red Hat Entreprise Linux.
- Welcome : Click on Forward
- License Agreement : select Yes, I agree to the License Agreement and click on Forward.
- SELinux : Select Disabled from the drop down bar and click on Forward.
- Kdump : Do not enable Kdump. Accept the default and click on Forward.
- Date and Time : Set the Date and Time. If you want to use an NTP server (recommended), select Enable Network Time Protocol and enter the name of the NTP server.
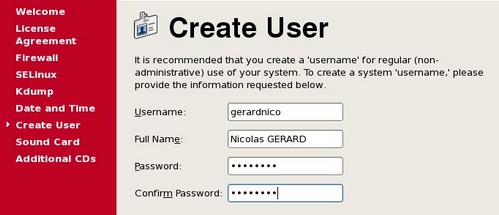
- System User : Create an account for yourself.
- Sound Card : No sound card was detected, click on Forward.
- Additional CDs : Click on Finish.
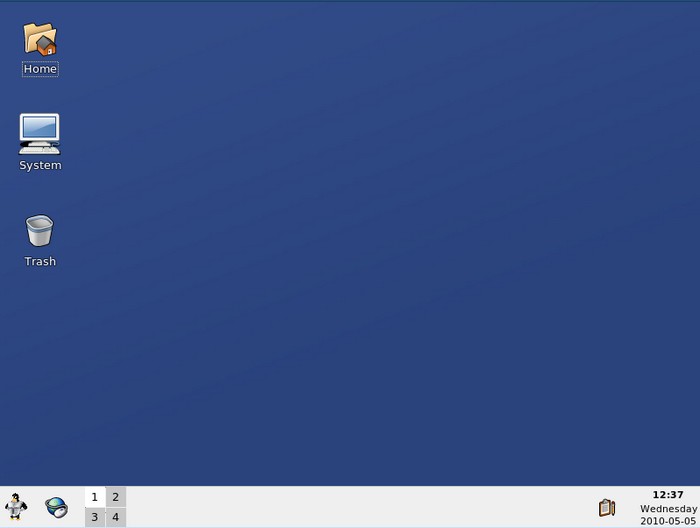
- The system will reboot. A graphical login screen appears. Enter your credential.
And you can see the KDE Gui as I have choose it during the installation.
Post-Installation task
- Activate your network interface