
D3 - Dev Installation
About
This article describe a dev environment installation with:
- Webpack for Hot reloading
- D3 Documentation in the IDE
The work and scripts are also available on GitHub. gerardnico/create-d3-app
A static web project is still a simpler method. In every IDE, you can still start a debugging session with a javascript embedded in a HTML page
Steps
npm
Library installation
npm init -y # Create a package.json file with the default value
npm install d3
npm install --save-dev webpack-dev-server
npm install --save-dev webpack
npm install --save-dev eslint
npm install --save-dev copy-webpack-plugin
where:
- d3 is the d3 library
- webpack-dev-server is a web server with hot reloading capability. See Webpack - Dev Server
- webpack is a module bundler. See WebPack - Getting Started - Example =
- eslint is a linter. See Javascript - Linter / Minification (EsLint / Tern / Uglify)
- copy-webpack-plugin is a plugin to copy the data files to the dist build directory
Directory structure
--- dist /
        -- index.html
        -- bundle.js
        -- data /
            -- file.csv
            -- file.json
--- src /
        -- myD3.js
--- data /
        -- file.csv
        -- file.json
package.json
webpack.config.js
where:
- dist/bundle.js is created by webpack
- dist/index.html
<html>
<head>
    <title>D3 Home</title>
</head>
<body>
<script src="bundle.js"></script>
</body>
</html>
- src/myD3.js.js is your source code. Example:
import * as d3 from "d3";

var section = d3.select("body").append("section");
d3.select();
section.append("div")
    .html("First!");
section.append("div")
    .html("Second!");
- webpack.config.js
const path = require('path');
const CopyWebpackPlugin = require('copy-webpack-plugin')

const paths = {
    src: path.join(__dirname, 'src'),
    dist: path.join(__dirname, 'dist'),
    data: path.join(__dirname, 'data')
}

module.exports = {
    // The entry key describes the entry file where the scripts and styles should be imported to
    entry: ['./src/index.js'],
    // The output key describes the wanted output
    output: {
        filename: 'bundle.js',
        path: paths.dist
    },
    // The dev server description
    devServer: {
        contentBase: paths.dist,
        compress: true,
        port: 9000
    },
    plugins: [
        // Copy the data
        new CopyWebpackPlugin([
          {
            from: paths.data,
            to: paths.dist + '/data'
          }
        ])
      ],
}
- package.json
{
  "name": "D3",
  "version": "1.0.0",
  "description": "A D3 hot reload dev environment",
  "scripts": {
    "start": "webpack-dev-server"
  },
  "dependencies": {
    "d3": "^4.10.2"
  },
  "devDependencies": {
    "webpack": "^3.6.0",
    "webpack-dev-server": "^2.8.2",
    "eslint": "^4.7.2",
    "copy-webpack-plugin": "^4.0.1"
  }
}
Starting the server
- you start the server with npm.
npm start
- and can see the output at the following url. http://localhost:9000
First!
Second!
If you change your code in the file myD3.js, the page will be hot reloaded and you will see the changes.
Documentation in IDE VsCode
VSCode lets you see the documentation. Ctrl+Q on the symbol.
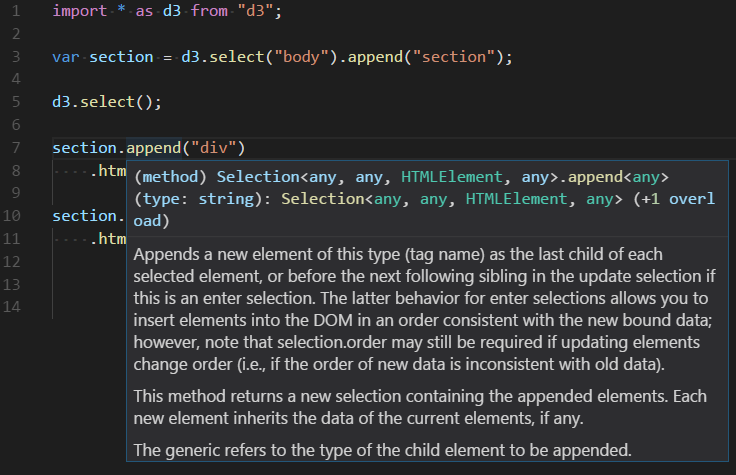
- Idea does offer the documentation if you install the declaration files
Others
The extension operates in two modes - it can launch an instance of Chrome navigated to your app, or it can attach to a running instance of Chrome. Both modes requires you to be serving your web application from local web server, which is started from either a VS Code task or from your commandline. Using the url parameter you simply tell VS Code which URL to either open or launch in Chrome.