OWB - Workflow Installation for OWB 11g
About
Step by step article on how to configure Oracle Workflow for OWB 11g
Articles Related
Steps
To start the Workflow Server installation and configuration script on Windows: In a command prompt window, change to the directory owb_home /owb/wf, and run wfinstall.bat. For example:
C:\> cd owb_home \owb\wf\install c:\cd owb_home /owb/wf\install> wfinstall.bat
To start the installation and configuration script on Linux: In a Unix shell, change to the directory owb_home /owb/wf, and run wfinstall.csh. For example:
$ cd owb_home /owb/wf/install $ wfinstall.csh
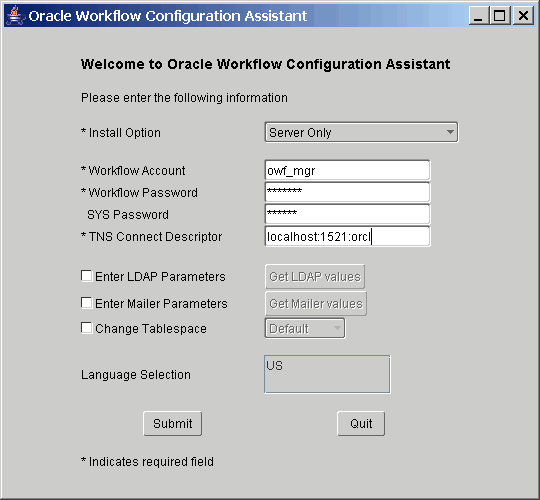
The Oracle Workflow Configuration Assistant dialog box appears.
Enter the following values:
- For Install Option, choose Server Only
- For Workflow Account, enter owf_mgr
- For Workflow Password, enter your chosen password for the Workflow Account, such as owf_mgr
- For SYS Password, enter the SYS password for the database where you are installing Oracle Workflow
- For TNS Connect Descriptor, enter hostname : port : service_name, where the values of hostname, port, and service_name correspond to your database
Note : Do not use a net service name as provided in your database tnsnames.ora file. The Workflow Configuration Assistant does not reference your tnsnames.ora file in this installation scenario.
When you have entered all necessary values, click Submit to start the Workflow configuration process. The configuration process will take several minutes. You can check owb_home /owb/wf/install/wf.log for messages to follow the progress of the configuration process.
When the process is complete, the Workflow Configuration Assistant displays a dialog box with the message “Workflow Configuration has completed successfully”. Click OK . The installation script now exits.
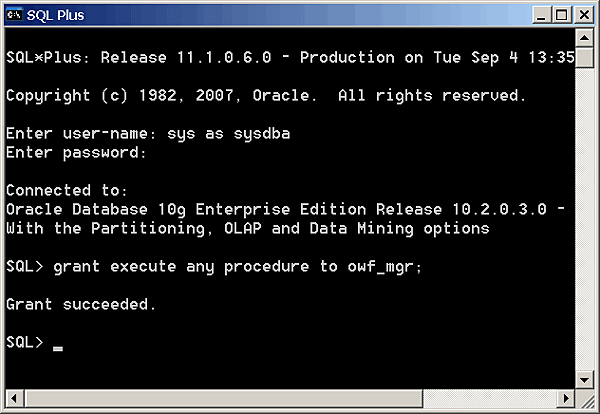
Finally, you need to grant the “EXECUTE ANY PROCEDURE” privilege to the owf_mgr user. Connect to SQL Plus as “SYS as sysdba”, and issue the command: grant execute any procedure to owf_mgr


